
Saturday, January 26, 2019
It's been a long, long while since I posted, as both my daughters are much older now, and this blog was intended for younger GS troops. If you notice any outdated information or links within my previous posts, leave a comment on the individual post. Please note, I've had some issues with scammers posting comments containing bad links unrelated to GS. I appreciate your patience as I've had to enable post approval. Thank you!
Sunday, June 26, 2016
Juniors: aMUSE Journey Supplement (Self-Esteem/Friendship/Bullying/Stereotypes)
I hope this works! It's been a long time since I tried to link to a file, so if you have issues, please let me know.
I am not a fan of Journeys, honestly. I think they are far too much like homework, and require too much work on the part of leaders to make them relevant to the girls, and engaging.
However, since GSUSA currently requires completion of a Journey for the Bronze Award, we partnered up with another Junior troop to knock out the aMUSE Journey in a day.
I didn't like how this Journey focused so heavily on careers (in my view). We have many girls who needed a focus on self-esteem, and how to deal with bullying. We had many who are struggling at school with their peers (and their own self-image), and to me, this was a priority over trying on "roles."
So I came up with the "All About Me" book to address the more important issues in depth, and the other leader helped with other activities and we both worked together in planning and gathering supplies.
It's possible there are other Journeys out there that already included these issues, but the aMUSE one is what the girls picked ahead of time -- based on flipping through the three Journey books I'd brought in. They immediately dismissed the others as "boring."
But I didn't want to pass up the opportunity to help with some of the relevant and current issues my girls are having, which is why I created this book project for them as part of their Journey.
Looking for a way to address some of these issues with younger girls? Check out the Brownie Community badge I totally revamped, specifically to work on friendship and inclusion.
I'm not going to get into a tutorial on how to do the entire Journey in one day (sorry! But there are loads of good ideas on the Internet, and some usable ideas, IMO, from the leader book, that you can use for your own girls), I focused on something that I felt was far more relevant to the girls at this age (4th & 5th graders), and saved it in a format that I could link to for this blog. :)
This book project was addressing not only self-awareness, but also the difference between true friends and bullies, stereotypes, and how to break them, etc.
Here are some sample pages -- for the full .pdf file, scroll down.


We pulled out every craft item we had for this -- loads of things, and made sure they weren't stereotypical, either! Every girl created her own individual book, celebrating her as an individual.
If you choose to use this supplement, you will need to print each "book" (front/back) beforehand, and hole punch the pages for binding. Then bring gobs of craft materials for them to decorate the books, and either have them bring in a picture of themselves, or take a Polaroid of each when they arrive.
We used ribbon and yarn through the holes to keep the pages together, then crafted with construction paper and colorful duct tape for the binding (though some girls chose to use other craft supplies, which was fine! We let them run wild with decorating it).
I hope you find the book helpful. As always, pick what works for your troop!
Here is the link to our All About Me book.
-TLM
I am not a fan of Journeys, honestly. I think they are far too much like homework, and require too much work on the part of leaders to make them relevant to the girls, and engaging.
However, since GSUSA currently requires completion of a Journey for the Bronze Award, we partnered up with another Junior troop to knock out the aMUSE Journey in a day.
I didn't like how this Journey focused so heavily on careers (in my view). We have many girls who needed a focus on self-esteem, and how to deal with bullying. We had many who are struggling at school with their peers (and their own self-image), and to me, this was a priority over trying on "roles."
So I came up with the "All About Me" book to address the more important issues in depth, and the other leader helped with other activities and we both worked together in planning and gathering supplies.
But I didn't want to pass up the opportunity to help with some of the relevant and current issues my girls are having, which is why I created this book project for them as part of their Journey.
Looking for a way to address some of these issues with younger girls? Check out the Brownie Community badge I totally revamped, specifically to work on friendship and inclusion.
I'm not going to get into a tutorial on how to do the entire Journey in one day (sorry! But there are loads of good ideas on the Internet, and some usable ideas, IMO, from the leader book, that you can use for your own girls), I focused on something that I felt was far more relevant to the girls at this age (4th & 5th graders), and saved it in a format that I could link to for this blog. :)
This book project was addressing not only self-awareness, but also the difference between true friends and bullies, stereotypes, and how to break them, etc.
Here are some sample pages -- for the full .pdf file, scroll down.

I love this so much!

We focused on boosting self-esteem, a LOT!

Identifying a True Friend is something many of my girls struggle with
We pulled out every craft item we had for this -- loads of things, and made sure they weren't stereotypical, either! Every girl created her own individual book, celebrating her as an individual.
If you choose to use this supplement, you will need to print each "book" (front/back) beforehand, and hole punch the pages for binding. Then bring gobs of craft materials for them to decorate the books, and either have them bring in a picture of themselves, or take a Polaroid of each when they arrive.
We used ribbon and yarn through the holes to keep the pages together, then crafted with construction paper and colorful duct tape for the binding (though some girls chose to use other craft supplies, which was fine! We let them run wild with decorating it).
I hope you find the book helpful. As always, pick what works for your troop!
Here is the link to our All About Me book.
-TLM
Halloween Scavenger Hunt
I used this as an extra part of our Junior Detective badge, but this would work for many levels, I think, with some adjustments where needed.
It was a really fun event and the girls loved it! It took some prep time (mostly coming up with the riddles -- which I've shared below, and that should cut out a good chuck of prep time for you!), but it was worth every minute. We had a blast!
A little backstory: I love to tell stories, and one time, during a stormy troop meeting, I told the girls a story about some giants and a thunderstorm (just to distract them from the real storm outside). When it was over, one little girl asked me if the giants had anything to do with tornados and I flippantly responded that giants had nothing to do with tornados. Then I added, "THAT was a witch. But that's a story for another day."
Then that little girl proceeded to ask me, at every troop meeting that followed, to tell the story about the witch and the tornado. I promised them I would, at some point, once I'd made up a good tale.
Problem was, I tried for a long time, but couldn't make up a good story involving a witch and a tornado that wasn't super scary. I didn't want it to be scary (a tornado story should be funny, or at least not scary, since tornados aren't nearly uncommon enough around here).
I was stumped.
Then while trying to come up with a fun activity for the Detective badge, it hit me: We could do a scavenger hunt and have the clues reveal the story.
And they LOVED it!
You can give your girls any amount of information ahead of time that you wish. I didn't say a word to them about the story I'd promised to tell them one day (the scavenger hunt was how I told it, with clues leading up to the reveal). I just let them find the clues and figure it out themselves. Halloween was the perfect time for this tale.
I required RSVPs for this event, in order to prep ahead of time for teams of two. I had each girl bring a food item for potluck, as it was also a Halloween party for the troop. You can do it however you wish. :)
You Will Need the Following (scroll way down for details on where to hide Morse Code clues):
- Printer paper
- Printer
- Laminating sheets (if desired)
- Scissors to cut clues, etc.
- Witch hat
- One paper pad and pencil per team
- Fly printables, cut out and laminated (see below)
- Glue dots or tape (to adhere flies/Morse Code clues)
- Extension cord (optional -- for speaker dock)
- iPod (or similar) with speaker dock, with bird song on repeat. I used this bird song. (Don't have an iPod or dock? Get creative! See below)
- Old digital clock with "2:00" taped on it (see below)
- Old cooking pot with fireplace ashes in it (need something with a burned smell. We just scooped out charcoal ashes from the grill, dumped them in a pot, then put the pot on the [cold] grill, and shut the lid)
- Fake poop (I found this at the local dollar store -- you could make your own out of clay? This is gross but the girls laughed so hard!)
- Hand fan
- Wand (see this post for tutorial to make your own)
- Riddle clues 1-9 printed, cut, and folded (one per team -- place in envelope
- Riddle clue 10, printed, cut (one per team -- you keep)
- Morse Code Clues (only need to print out ONE copy each of these. Cut and laminate if desired, then hide them accordingly and mark hiding spot with a fly)
- 2 envelopes per team (one marked "Completed")
- 1 envelope for you to keep copies of riddle clue #10 in
- Master Answer Sheet (see below -- For Your Eyes Only)
- Pencils (one per team, but you'll need spares)
- Notepads (one per team)
- 1 print out of Morse Code key per team (corresponds to riddle clue 10)
- A large area (preferably outdoors) where you can place the clues before girls arrive (more info below)
- Another adult volunteer to help place clues and set everything up beforehand (optional)
Ahead of Time:
Print out enough 1-9 riddle clues so each team gets one of each clue, cut the clue strips out and fold them up, then place in an envelope. (You're folding them so they will draw one random clue at a time. It's more fun to do it out of order initially, plus that way you don't have teams searching for the same clues at the same time.) Make sure each envelope has all 1-9 clues in it.
Print out riddle clue #10 (one per team), but you keep these in your own envelope to give to girls when they've completed 1-9.
Print out copies of Magical Key and place at riddle clue #10's spot (wand). Each team takes one when they find it. So print out enough for each team to have one.
But save riddle clue #10 until they've finished 1-9. It's likely you will have some teams working on it sooner than others, and if you want them all to work together to decode the final message from all the Morse Code clues at the end, then have them take a break to eat once they've gotten all 9 clues plus #10 with the key. Then work together as a group to solve it.
Print out each Morse Code Clue, cut and laminate. You only need one of each of these, because they will be hidden all over, and the girls copy it down. (Make sure to tell them not to take or move it. Just copy the code on it, leave everything as they found it for the next team, and move on.)
Print out the flies (you will need nine small and one large -- see below). Laminate and use glue dots or tape (as needed) to stick them near the objects hiding the Morse Code clues. Don't stick on painted surfaces unless you're okay with the glue peeling the paint.
You don't have to laminate anything but the weather forecast for us was iffy with possible rain, and I was using a standard inkjet printer -- the colors would've run if wet. So I laminated the Morse Code clues and flies, and covered the speaker dock with a plastic bag.
Make a list of girls attending, and put them into teams. I labeled the teams by color, and each team received corresponding envelopes.
You can have them draw names if you prefer to make teams that way. We have a large troop, and it was just easier to assign teams beforehand. We had two girls per team, but you can do it however you want. Don't go above three per team though, and some of the clues ended up being a bit challenging, so I was glad we didn't have them do it all individually.
Each team receives one envelope full of folded riddle clues 1-9 to find, one envelope to place completed clues, a pad of paper, and a pencil.
Do not include riddle clue #10. The girls will come to YOU to receive those, once they've completed 1-9.
It worked out so that we had the girls all come together at the end to work on deciphering the end puzzle together. It was great!
The Day of the Scavenger Hunt:
My Camp Mom helped with this and we both dressed up as witches, and decorated the house with Halloween decor.
We hid the Morse Code Clues with corresponding objects, all over the front and back yard. We kept it outdoors because the weather ended up cooperating, and spread clues out all over so the teams wouldn't be stumbling over one another.
When the girls arrived, we put them into teams, explained that they would take ONE riddle clue out of each envelope (doesn't matter which one), then try to find the item that corresponded to that clue.
You can tell them that each hiding spot is marked with a FLY, but we didn't. They figured it out quickly enough.
We did tell them but they weren't to touch any object they found unless it corresponded to the riddle clue they were working on. Because once they figured out the flies marked the hiding spots, it would've been tempting to not solve the actual riddle clues in order to find the Morse Code.
They did great and ignored flies in random spots, focusing only on the clue they had drawn from their envelope.
Once they'd found the right item from the riddle clue, they were to look for a Morse Code clue, and copy it EXACTLY as it appeared, and mark it with the riddle clue number.
This is very important, because they were solving the riddle clues out of order, and copying down Morse Code out of order, but in order to decipher the end message, they had to have the clues in the right order from 1-9 (the Morse Code spelled out a sentence). Clue #10 lets them find the Morse Code key (don't tell them that though -- let it all be a surprise!).
Be sure to tell your girls to leave the Morse Code clue, item, and fly where they found it, copy the Morse Code with clue #, then put their used riddle clue into their "Completed" envelope, and pull out the next folded clue.
We told them the clues could be found in the backyard and in the front yard, and all "off limits" areas (garage, parts of porch, etc.) were marked off.
We handed out the envelopes (don't open them until we say go!), then gave each team the "Before you begin" sheet, notepads, and pencils. They were to go off with their teammate to an area of the yard (front or back), and read the "Before you begin" sheet, then start with their first riddle clue.
Once they'd solved riddle clues 1-9 (and copied down the Morse Code) they were to return to us for the final clue #10.
We told them if they were unable to solve a riddle clue, they could come to us for additional hints. At that point, we basically told them front yard or back yard, and off they went! The purpose wasn't to go randomly searching for flies. It was to think of what the answer could be, for each riddle, then search for an item that corresponded to it.


Clue #9 is the same as 1-8: Print, cut, and fold. Then place in each team's envelope. Cut out Clue #10 and save it to hand out as each team completes 1-9. This way they don't get the Morse Code Key until the very end (otherwise they'll try to decipher as they go).


Here's a printable version:

It was a really fun event and the girls loved it! It took some prep time (mostly coming up with the riddles -- which I've shared below, and that should cut out a good chuck of prep time for you!), but it was worth every minute. We had a blast!
A little backstory: I love to tell stories, and one time, during a stormy troop meeting, I told the girls a story about some giants and a thunderstorm (just to distract them from the real storm outside). When it was over, one little girl asked me if the giants had anything to do with tornados and I flippantly responded that giants had nothing to do with tornados. Then I added, "THAT was a witch. But that's a story for another day."
Then that little girl proceeded to ask me, at every troop meeting that followed, to tell the story about the witch and the tornado. I promised them I would, at some point, once I'd made up a good tale.
Problem was, I tried for a long time, but couldn't make up a good story involving a witch and a tornado that wasn't super scary. I didn't want it to be scary (a tornado story should be funny, or at least not scary, since tornados aren't nearly uncommon enough around here).
I was stumped.
Then while trying to come up with a fun activity for the Detective badge, it hit me: We could do a scavenger hunt and have the clues reveal the story.
And they LOVED it!
You can give your girls any amount of information ahead of time that you wish. I didn't say a word to them about the story I'd promised to tell them one day (the scavenger hunt was how I told it, with clues leading up to the reveal). I just let them find the clues and figure it out themselves. Halloween was the perfect time for this tale.
I required RSVPs for this event, in order to prep ahead of time for teams of two. I had each girl bring a food item for potluck, as it was also a Halloween party for the troop. You can do it however you wish. :)
"THE WITCH AND THE FLY" SCAVENGER HUNT
You Will Need the Following (scroll way down for details on where to hide Morse Code clues):
- Printer paper
- Printer
- Laminating sheets (if desired)
- Scissors to cut clues, etc.
- Witch hat
- One paper pad and pencil per team
- Fly printables, cut out and laminated (see below)
- Glue dots or tape (to adhere flies/Morse Code clues)
- Extension cord (optional -- for speaker dock)
- iPod (or similar) with speaker dock, with bird song on repeat. I used this bird song. (Don't have an iPod or dock? Get creative! See below)
- Old digital clock with "2:00" taped on it (see below)
- Old cooking pot with fireplace ashes in it (need something with a burned smell. We just scooped out charcoal ashes from the grill, dumped them in a pot, then put the pot on the [cold] grill, and shut the lid)
- Fake poop (I found this at the local dollar store -- you could make your own out of clay? This is gross but the girls laughed so hard!)
- Hand fan
- Wand (see this post for tutorial to make your own)
- Riddle clues 1-9 printed, cut, and folded (one per team -- place in envelope
- Riddle clue 10, printed, cut (one per team -- you keep)
- Morse Code Clues (only need to print out ONE copy each of these. Cut and laminate if desired, then hide them accordingly and mark hiding spot with a fly)
- 2 envelopes per team (one marked "Completed")
- 1 envelope for you to keep copies of riddle clue #10 in
- Master Answer Sheet (see below -- For Your Eyes Only)
- Pencils (one per team, but you'll need spares)
- Notepads (one per team)
- 1 print out of Morse Code key per team (corresponds to riddle clue 10)
- A large area (preferably outdoors) where you can place the clues before girls arrive (more info below)
- Another adult volunteer to help place clues and set everything up beforehand (optional)
Ahead of Time:
Print out enough 1-9 riddle clues so each team gets one of each clue, cut the clue strips out and fold them up, then place in an envelope. (You're folding them so they will draw one random clue at a time. It's more fun to do it out of order initially, plus that way you don't have teams searching for the same clues at the same time.) Make sure each envelope has all 1-9 clues in it.
Print out riddle clue #10 (one per team), but you keep these in your own envelope to give to girls when they've completed 1-9.
Print out copies of Magical Key and place at riddle clue #10's spot (wand). Each team takes one when they find it. So print out enough for each team to have one.
But save riddle clue #10 until they've finished 1-9. It's likely you will have some teams working on it sooner than others, and if you want them all to work together to decode the final message from all the Morse Code clues at the end, then have them take a break to eat once they've gotten all 9 clues plus #10 with the key. Then work together as a group to solve it.
Print out each Morse Code Clue, cut and laminate. You only need one of each of these, because they will be hidden all over, and the girls copy it down. (Make sure to tell them not to take or move it. Just copy the code on it, leave everything as they found it for the next team, and move on.)
Print out the flies (you will need nine small and one large -- see below). Laminate and use glue dots or tape (as needed) to stick them near the objects hiding the Morse Code clues. Don't stick on painted surfaces unless you're okay with the glue peeling the paint.
You don't have to laminate anything but the weather forecast for us was iffy with possible rain, and I was using a standard inkjet printer -- the colors would've run if wet. So I laminated the Morse Code clues and flies, and covered the speaker dock with a plastic bag.
Make a list of girls attending, and put them into teams. I labeled the teams by color, and each team received corresponding envelopes.
You can have them draw names if you prefer to make teams that way. We have a large troop, and it was just easier to assign teams beforehand. We had two girls per team, but you can do it however you want. Don't go above three per team though, and some of the clues ended up being a bit challenging, so I was glad we didn't have them do it all individually.
Each team receives one envelope full of folded riddle clues 1-9 to find, one envelope to place completed clues, a pad of paper, and a pencil.
Do not include riddle clue #10. The girls will come to YOU to receive those, once they've completed 1-9.
It worked out so that we had the girls all come together at the end to work on deciphering the end puzzle together. It was great!
The Day of the Scavenger Hunt:
My Camp Mom helped with this and we both dressed up as witches, and decorated the house with Halloween decor.
We hid the Morse Code Clues with corresponding objects, all over the front and back yard. We kept it outdoors because the weather ended up cooperating, and spread clues out all over so the teams wouldn't be stumbling over one another.
When the girls arrived, we put them into teams, explained that they would take ONE riddle clue out of each envelope (doesn't matter which one), then try to find the item that corresponded to that clue.
You can tell them that each hiding spot is marked with a FLY, but we didn't. They figured it out quickly enough.
We did tell them but they weren't to touch any object they found unless it corresponded to the riddle clue they were working on. Because once they figured out the flies marked the hiding spots, it would've been tempting to not solve the actual riddle clues in order to find the Morse Code.
They did great and ignored flies in random spots, focusing only on the clue they had drawn from their envelope.
Once they'd found the right item from the riddle clue, they were to look for a Morse Code clue, and copy it EXACTLY as it appeared, and mark it with the riddle clue number.
This is very important, because they were solving the riddle clues out of order, and copying down Morse Code out of order, but in order to decipher the end message, they had to have the clues in the right order from 1-9 (the Morse Code spelled out a sentence). Clue #10 lets them find the Morse Code key (don't tell them that though -- let it all be a surprise!).
Be sure to tell your girls to leave the Morse Code clue, item, and fly where they found it, copy the Morse Code with clue #, then put their used riddle clue into their "Completed" envelope, and pull out the next folded clue.
We told them the clues could be found in the backyard and in the front yard, and all "off limits" areas (garage, parts of porch, etc.) were marked off.
We handed out the envelopes (don't open them until we say go!), then gave each team the "Before you begin" sheet, notepads, and pencils. They were to go off with their teammate to an area of the yard (front or back), and read the "Before you begin" sheet, then start with their first riddle clue.
Once they'd solved riddle clues 1-9 (and copied down the Morse Code) they were to return to us for the final clue #10.
We told them if they were unable to solve a riddle clue, they could come to us for additional hints. At that point, we basically told them front yard or back yard, and off they went! The purpose wasn't to go randomly searching for flies. It was to think of what the answer could be, for each riddle, then search for an item that corresponded to it.

Print one of each of these to give to each team with their initial envelopes, pencils, and notepads.
The following clues will be cut into strips, folded, and placed in each team's envelope:

Print one of these per team, cut each clue out and fold, then place in Clues Envelope

Print one of these per team, cut each clue out and fold, then place in Clues Envelope

Save Clue #10 to hand each team once they've completed Clues 1-9.

Print one Magical Key per team and leave them at the "wand" hiding spot.

Giant fly corresponds to clue #9 only

Use the small flies to mark hiding spots

Print this to tape over a digital clock (doesn't need to be plugged in)
Where to Hide the Morse Code Clues:
We spread them out over a really big backyard, and then also placed some way over in the front yard, to spread the teams out a bit. Use your imagination, but keep in mind that the harder you hide the flies and clues, the longer the scavenger hunt will take. That might be a good thing! Or not. As always, adjust to suit your troop.
Don't forget to mark each clue's hiding spot with a fly!
Clue 1 - Fire Pit (or fireplace or heater. Don't have any of those? Get some hand warmers, or a big blanket, etc.). Fly was on top of a rock in the (cold) fire pit. Morse Code clue was taped to the underside of the rock.
Clue 2 - Speaker/iPod with bird song on repeat (don't have this? Have an extra helper literally hiding and making a bird sound); we used an extension cord from the garage (taped down so no one would trip) and put it at the corner of the yard. The fly was taped atop the dock, and the Morse Code card tucked with edge under the dock.
Clue 3 - Clock with "2:00" taped on it
Clue 4 - An Old Pot inside the covered grill -- with burned smell (we put charcoal ashes inside the old pot)
Clue 5 - Fake Poop (this was one of the hardest for them to find! We taped the Morse Code on the underside of the fake poop, and taped the fly right on top, and stuck the "poop" at the base of a tree, way back in the yard. It was hilarious when each team found it. They had to pick it up to copy the code.
Clue 6 - Hand Fan (or a portable battery fan, etc.)
Clue 7 - Window Pane (we just taped the Morse Code clue onto the window at eye level, with a fly next to it)
Clue 8 - Witch's Hat (we placed it on the porch, but the house was decorated with Halloween stuff, so it took a bit for some to find)
Clue 9 - Giant Fly (laminate if desired, and place this wherever you want. We taped the Morse Code clue on the back of it)
Clue 10 - Wand (we hid this underneath a cushion on a chair out front. The fly was taped to the chair, and the wand with clue was under the cushion).
Morse Code Clues:
Print out one of each, laminate if desired (highly recommended, since you're going to be taping them down at times), and hide with corresponding objects listed above.

Print out, cut out each one, laminate, and hide (mark spot with fly)

Print out, cut out each one, laminate, and hide (mark spot with fly)

Print out, cut out each one, laminate, and hide (mark spot with fly)

Print out, cut out, laminate, and hide (mark spot with fly, and don't forget to put the Magical Key sheets there as well)
MASTER ANSWER KEY:
Here is the list of clues with Final Answer for you to read aloud (in quasi-story-form) at the end, after they've figured it all out, if you wish:
Once upon a time, there was a short-tempered witch. One day, while she was outside working on a new spell, a fly flew into her yard. And this is what happened....
1. Brr, brr, it's getting cold! And the spell is incomplete.
Find the fly who buzzed into the Witch's source of heat.
2. Tip-toe in, be quiet now, and listen for the bird.
Who'd help the Witch and catch the fly, if only it were heard.
3. Now's the time to use your eyes, look for the hidden clue.
It's near the fly who buzzed into the clock that just struck two.
4. The fly is maddening! Think with your nose!
Chasing flies made Witch forget the pot upon the stove.
5. Shoo, shoo, fly! What is that smell?
Ew gross, the poop upon the floor made Witch forget her spell.
6. Yikes! It's getting warm in here, the witch is getting hot!
She's hopping mad, and needs a fan, to cool her on the spot!
7. That awful fly won't leave her be. It's driving Witch insane.
It won't stop buzzing over her head, upon the window pane..
8. Witch so mad, she blew her top. Her hat flew off her head.
The fly buzzed 'round and drove her nuts, she couldn't kill it dead.
9. “I know,” Witch thought. “I'll cast a spell, and slow the fly in flight!”
But spell went wrong and fly grew BIG! And gave the Witch a fright!
10.“ No more!” she cried, and waved her wand to cast a wicked charm.
“The fly will die! Is not enough to do it just some harm.”
She put all of her anger in the spell to kill the fly.
And here's your final clue: All the bits you found today?
Here's the key to find the truth!
FINAL ANSWER:
1. The answer
2. that has
3. been eluding
4. you is
5. all because
6. of a
7. tiny buzzing
8. fly, the
9. witch created
10. a tornado!
The answer that has been eluding you is all because of a tiny buzzing fly, the witch created a tornado!
Here's a printable version:

For Your Eyes Only!
And that's it! We had a great time with this activity. I'm way behind on posting here because it's been a crazy busy year, so I will try to catch up over the summer.
As always, if you have questions or comments, feel free to post them below. Thanks!
Thursday, December 10, 2015
Juniors: Detective Badge: Science (This is long! Grab your coffee now)
Before I get started, please note that a lot of the prep work can be done by the girls in a meeting. But we were going to be pressed for time, so I did as much prep work beforehand as possible, because I wanted to do all of this in one meeting. It was a lot, but was GREAT!
Now, you can use the suggested activities in the Junior binder, and that's fine! But as usual, I went a little outside the box. Do what works best for you and your troop! But you might enjoy one of the activities here.
It took a little over an hour and a half for the actual meeting activities (which we completed, except for the shoe prints, which were a take-home for most girls), but there was a LOT of prep time! And we were careful to keep an eye on the clock. It could've taken 2 hours to do. Or you can break it up into two meetings. Whatever works.
We began the meeting with a bit of a discussion about what a Detective is, and all about different codes (including the Code Talkers), etc. When talking about Morse Code, be sure to tell your girls that when it is written as a message, the dashes should be slightly elevated on the paper -- this ensures it is read right-side-up, not upside-down. (It also makes the dashes easier to see.)

My 15 girls were split into three patrols (patrols are typically Juniors and up, and the next step up from buddies/pairs; here's a bunch of info about patrols), we had three stations (one overflow area for shoe prints), and the girls rotated, spending about 20 minutes at each station. If you're moving quickly, skip naming patrols and electing leaders, etc. Just split them up randomly and go!
I had two parent volunteers on hand -- it depends upon how many girls you have (we had 15 for this meeting), as to how many you will need. More parents arrived towards the end, and it was great to have several helpers! I would recommend three volunteers if possible, so you can float from station to station and continue elaborating on how it ties into being a detective.
To earn our badge, we did Fingerprinting, Shoe Prints, Color (Secret) Codes, Morse Code Necklaces, and DNA extraction. (We had a scavenger hunt Halloween party afterwards, which tied in nicely to the Detective Badge, and I'll list details in Part Two.)
You will need at least 3 tables for this meeting, and will have to do clean up as you go. If you're going to have a snack, do it first! And I recommend removing vests before you begin the meeting, as it will get messy.
I have a big Thirty-One large utility tote that I carried everything in, atop my wheeled file box (which held things like my soft cooler for the rubbing alcohol, portable recycle bin, paperwork, flag, etc.). The activity supplies were placed in labeled gallon Ziplocs where possible, and instructions were included, so I didn't have to waste time explaining it to my volunteers. They read over the instructions during snack. The only cumbersome thing was the poster frame.
All of the items listed are to accommodate 15 girls. Adjust as needed. As always, you might find a shortcut to the way I did it. If so, please post and let me know how it worked! I tend to overcomplicate things at times. . . .
FINGERPRINTS:
You will need the following items for this activity:
(Do at home ahead of time unless you are spreading this badge over more than one meeting. You can have the girls do more prep work, but it's very messy. It's up to you):
- 3-4 full sized (9"x11") sheets of sandpaper
- 1 four-pack of graphite sticks (Michael's, drawing/art section, or Amazon)
- 1 piece of paper that's been folded in half then re-opened
- Plastic gloves (optional)
(Bring to meeting:)
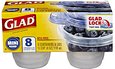
- 5 small plastic containers (reusable Glad or other brand works well)
- 20+ index cards (they might mess up, so have spares)
- Pre-printed fingerprint cards (see below)
- 5 makeup brushes (big and old -- these will be pretty much ruined, so use cheap ones!)
- 1 small container hand lotion
- Poster frame (or similar acrylic type surface -- our tables are wooden and have grooves, so we needed something very flat)
- Clear packing tape
- Scissors
- 2 stamp pads (washable ink)
- 1 roll paper towels
- Access to a sink for hand-washing (soap)
- Pencils or pens to write names on things
Prepare before meeting:
- I used one four-pack of graphite sticks from Michaels (art/drawing section). You can use regular pencils (it's a pain though as you have to stop and sharpen them constantly), sidewalk chalk, or powdered cocoa. I've not tried any of that though. The graphite worked well.
- Wearing plastic gloves (optional, but it's very messy. Seriously), scrub the graphite against the sandpaper (just like you're coloring the sandpaper). Periodically tap the powdered graphite onto a sheet of paper that's been folded in half then opened (powder collects in crease). Pour powder into your small plastic container and make sure the lid is on tightly. In the end you should have 5 containers. Each one will be plenty for three girls to use. (5x3=15. Adjust yours as needed for how many girls you'll have.)
- Print out individual fingerprint cards:


Here's the thing. On my versions (scroll down to the red images), I can see the Morse Code symbols on the electronic version on my computer, but when I printed them out? Could not see them unless I knew to look for them. I tested it on my Daisy. She couldn't see anything but red designs. But when viewed through red glasses? We could both see the symbols clearly. So while you might be able to see something here on this site -- try printing it out and see if you still can (or not). Hopefully these will work. If not, Google is your friend! :)
A great online resource for making Morse Code messages can be found here.
Please note: If you have girls who are colorblind, a steganography activity probably won't work. But they can still participate if you're using a coded message like mine below (and not just colored letters to form a message, like above). Just have them work with a partner. The partner uses her red glasses and copies down the Morse Code, while the colorblind girl translates the code.
You will need the following items for this activity:
- Colored glasses (I made five total. Each pair was used three times)
- Colored messages (variety for each group, so not everyone is working on the same message)
- Scrap paper (one per girl)
- Pencils (ditto)
- Morse Code Key (see below)
- Helper cheat sheet so the volunteers could help prompt girls if they got stuck
Prepare before the meeting:
- Print out the sheets below and cut each in half (each sheet has TWO messages on it; each girl needs one message -- the last message probably won't work for your troop, so discard it)
- Print out the Morse Code keys (one per girl)
- Create a volunteer/helper cheat sheet with translations (keep this one folded away)
- Paperclip one message, one scrap paper, and one Morse Code key for each girl in each patrol (I had three groups of five, with one left over spare for each in case someone's didn't print out well). Make sure you use different red sheets for the girls in each patrol, so they aren't all working on the same message.
- Bundle each patrol's packets together, so it's easy for your volunteers to pull out a new batch for the next group
- Make your glasses (see below)
Red cellophane glasses:
You will need the following to make your own (one per girl, per group. You don't need to make each girl a pair of glasses if you're doing these activities as rotations. Just make the total you'll need per group):
- Card stock
- Cellophane (I used clear pocket divider cover things; you could use thick shrink wrap from packaging, etc. Just has to be thick and clear. Saran wrap won't work. Does your school have a laminating machine? I bet there's a bunch of scrap plastic you could use.)
- Red Sharpies (fresh is best)
- Tape
- Scissors
Follow the steps below to make your own. I made five glasses, but didn't bother to put ear pieces on them. The girls just held them with one hand, and it worked fine. If you have time, add ear pieces.
Make sure the marker on the cellophane pieces is DRY before you tape the red cellophane over the holes in your card stock, or else you'll end up with red ink everywhere. If your marker doesn't go on smoothly, use your finger to spread the ink around. It'll make a mess though, so wear gloves (also, rubbing alcohol works well for getting Sharpie off tables. Ha!)


Print out all this stuff:
You don't have to use my stuff. You can find others online, or make your own! But here's everything we used for the meeting. You will cut the red cards in half, and each girl in each group rotation/patrol gets a different one (so they aren't all working on the same message at the same time):


What to do in the actual meeting:
Make sure the girls coming from the Fingerprints table have washed their hands well. Smudged graphite can really mess with this activity.
Give each girl her paper-clipped bundle and a pencil. Tell her that each line of code is ONE word and to copy down the code exactly as she sees it. Don't try to translate it until you have everything copied down on your scrap paper. That way if they make a mistake, it's easier to find where they went wrong. (Reiterate how careful detectives are!)
You can have them draw one of these: "/" in between each letter, if that helps. Some of my girls used their pencils to trace/color over the code on the actual paper, which made it visible without the glasses. Very clever girls!
MORSE CODE NECKLACES:
You will need the following items:
- String/cord (pre-cut, one per girl. Make these a bit longer than necessary, to accommodate knots)
- Pony beads (variety, round)
- Tube beads (like these; see below)
- Morse Code sheets (see above)
Prepare before the meeting:
Make a sample necklace for yourself. Tie knots in between the words (or you could tie single knots in between letters and double knots in between words. Whatever you like). I used the same color beads for letters (so all my E letters were one color, etc.), but you don't have to do that. The round beads are dots. The tubes are dashes. The girls LOVED this!


DNA EXTRACTION:
Lots of great instructions online. Here's one example. Here's another. But don't worry; it's not nearly as complicated as it sounds. The key is to do it at least once at home so you won't stumble in the meeting, since timing is key. The measurements don't have to be exact, honestly. But try to get close if you can. It's more about proportions.
We finished the patrol/group rotations for the other activities, cleaned up, and then everyone did this together, in pairs. All my adult helpers pitched in, which was GREAT! This can get tricky in terms of timing, especially the last step, so having more hands on deck is good.
You will need the following items:
- Rubbing alcohol, chilled (I put mine in a cooler with ice the night before, and brought the cooler to the meeting with me)
- Small clear acrylic cups -- we worked in pairs for this, so I had two per pair. (You could use mixing bowls and cups instead, or go super fancy and get beakers. I just went to the Dollar store and bought cheap punch-size acrylic cups)
- Wooden popsicle sticks (skewers can work too. Toothpicks are a bit too small, IMO)
- Plastic spoons
- Dish liquid (any brand will do. I've heard Dawn works well but I used a clear liquid. It was fine)
- Sturdy Ziploc baggies (don't get the cheap ones, they'll rip)
- Frozen strawberries -- THAWED! (Frozen ones work best, because once they thaw, they're already mushy. Plus, they have the tops cut off). I bought two bags but really only needed one. You don't need a ton, maybe three or four per girl, if they're medium-sized berries)
- Salt
- Paper napkins (or cheesecloth if you have it. We just used generic paper napkins -- they were the soft, super cheap cheap, double-ply kind. Not the Disney Princess style that have a more solid outer layer. You want something that liquid can pass through easily, but that won't tear)
- Measuring cups/spoons
- Water
- Clean up towels for spills
Prepare before the meeting:
Run through it at least once beforehand. I should've done it twice, because I forgot a step early on during the meeting and had to start over. Which was no big deal, but that meant we ran over a little time-wise. So definitely do the experiment at home first, and I'd advise doing it twice just to be safe.
The night before, chill your alcohol and grab a cooler, so it'll still be cold for your meeting. And don't forget to thaw your strawberries! If you leave them out overnight on the counter they should be nice and mushy for your meeting the next day.
What to do in the actual meeting:
Talk to the girls about how detectives use DNA, and what DNA is (I was surprised that some had no idea, so we had a nice little quick intro to genetics).
1. Pass out the cups (two per pair), plastic spoons (one per pair), popsicle sticks (two per pair), and napkins (extras on hand in case of spills or tears, etc.).
2. Give each pair of girls a sturdy Ziploc, and scoop some mushy strawberries into each one. Make sure the baggies are very well sealed, with the air pushed out. Set aside.
3. Put 1/2 teaspoon salt, 1/3 cup water, and 1 tablespoon of dish liquid in one cup per pair of girls.
4. Have them use the spoons to gently mix the solution. This will be the extraction liquid. Set it aside.
5. Take turns gently mushing strawberries in baggies for ~2 minutes, or until it's as mushy as possible (they loved this part!). Set aside.
6. Have them place the napkins carefully over the top of the second cup. Press down in the middle so it sags well, and the strawberries won't spill over. Set aside. (You can use rubberbands to hold it in place, or just fingers.)
7. Add three tablespoons of the extraction liquid to the mushed strawberries baggy. You're done with the extraction cup (but hang on to it in case you need to re-do one).
8. Re-seal baggy (air pushed out) and work it through for another minute or so, until it's very well blended with the strawberries. Don't overwork it! You want to be gentle -- don't make bubbles.
9. Open the bag and carefully pour into the cup with the napkin on top. Have one girl hold the napkin in place with the middle pushed far down, while the other pours the mixture. Watch it drip into the cup.
10. Very gently pick up the edges of the napkin, so the mushy strawberry solution is contained within, then gently squeeze it so you get as much liquid into the cup as possible.
11. Carefully pick up the cup, then tilt it slightly. Pour a small amount (about 1-2 tablespoons? Test it at home and see) of chilled alcohol down the side of the cup (if you pour it straight in and it splashes, the experiment won't work as well).
12. Set the cup down and watch. It should start to work immediately. See the white layer forming? The alcohol is pulling strands of DNA from your mixture!
13. Use popsicle stick to carefully dip and grab the DNA strands.

Now, you can use the suggested activities in the Junior binder, and that's fine! But as usual, I went a little outside the box. Do what works best for you and your troop! But you might enjoy one of the activities here.
It took a little over an hour and a half for the actual meeting activities (which we completed, except for the shoe prints, which were a take-home for most girls), but there was a LOT of prep time! And we were careful to keep an eye on the clock. It could've taken 2 hours to do. Or you can break it up into two meetings. Whatever works.
We began the meeting with a bit of a discussion about what a Detective is, and all about different codes (including the Code Talkers), etc. When talking about Morse Code, be sure to tell your girls that when it is written as a message, the dashes should be slightly elevated on the paper -- this ensures it is read right-side-up, not upside-down. (It also makes the dashes easier to see.)

Make a point to talk about the different ways Morse Code can be used: light, sound, writing, etc.
My 15 girls were split into three patrols (patrols are typically Juniors and up, and the next step up from buddies/pairs; here's a bunch of info about patrols), we had three stations (one overflow area for shoe prints), and the girls rotated, spending about 20 minutes at each station. If you're moving quickly, skip naming patrols and electing leaders, etc. Just split them up randomly and go!
I had two parent volunteers on hand -- it depends upon how many girls you have (we had 15 for this meeting), as to how many you will need. More parents arrived towards the end, and it was great to have several helpers! I would recommend three volunteers if possible, so you can float from station to station and continue elaborating on how it ties into being a detective.
To earn our badge, we did Fingerprinting, Shoe Prints, Color (Secret) Codes, Morse Code Necklaces, and DNA extraction. (We had a scavenger hunt Halloween party afterwards, which tied in nicely to the Detective Badge, and I'll list details in Part Two.)
You will need at least 3 tables for this meeting, and will have to do clean up as you go. If you're going to have a snack, do it first! And I recommend removing vests before you begin the meeting, as it will get messy.
I have a big Thirty-One large utility tote that I carried everything in, atop my wheeled file box (which held things like my soft cooler for the rubbing alcohol, portable recycle bin, paperwork, flag, etc.). The activity supplies were placed in labeled gallon Ziplocs where possible, and instructions were included, so I didn't have to waste time explaining it to my volunteers. They read over the instructions during snack. The only cumbersome thing was the poster frame.
All of the items listed are to accommodate 15 girls. Adjust as needed. As always, you might find a shortcut to the way I did it. If so, please post and let me know how it worked! I tend to overcomplicate things at times. . . .
FINGERPRINTS:
You will need the following items for this activity:
(Do at home ahead of time unless you are spreading this badge over more than one meeting. You can have the girls do more prep work, but it's very messy. It's up to you):
- 3-4 full sized (9"x11") sheets of sandpaper
- 1 four-pack of graphite sticks (Michael's, drawing/art section, or Amazon)
- 1 piece of paper that's been folded in half then re-opened
- Plastic gloves (optional)
(Bring to meeting:)
- 5 small plastic containers (reusable Glad or other brand works well)
- 20+ index cards (they might mess up, so have spares)
- Pre-printed fingerprint cards (see below)
- 5 makeup brushes (big and old -- these will be pretty much ruined, so use cheap ones!)
- 1 small container hand lotion
- Poster frame (or similar acrylic type surface -- our tables are wooden and have grooves, so we needed something very flat)
- Clear packing tape
- Scissors
- 2 stamp pads (washable ink)
- 1 roll paper towels
- Access to a sink for hand-washing (soap)
- Pencils or pens to write names on things
Tiny Glad containers worked great for fingerprint powder
Prepare before meeting:
- I used one four-pack of graphite sticks from Michaels (art/drawing section). You can use regular pencils (it's a pain though as you have to stop and sharpen them constantly), sidewalk chalk, or powdered cocoa. I've not tried any of that though. The graphite worked well.
- Wearing plastic gloves (optional, but it's very messy. Seriously), scrub the graphite against the sandpaper (just like you're coloring the sandpaper). Periodically tap the powdered graphite onto a sheet of paper that's been folded in half then opened (powder collects in crease). Pour powder into your small plastic container and make sure the lid is on tightly. In the end you should have 5 containers. Each one will be plenty for three girls to use. (5x3=15. Adjust yours as needed for how many girls you'll have.)
- Print out individual fingerprint cards:

You can use card stock or regular paper for this.
Cut them up ahead of time if you'll be pressed for time during your meeting.
Create a sample stamped card to use as reference. Pack up everything with instructions in case there are other volunteers assisting.
What to do in the actual meeting:
- Have each girl write her name on an index card. Set aside.
- Have each girl write her name on the card, then stamp her fingerprints onto it.
- Wash hands.
- Apply small amount of hand lotion (otherwise the fingerprints won't show up).
- Press fingertip firmly onto poster frame.
- Gently pick up some powdered graphite with a blush brush and tap it over the fingerprint.
- Use the brush to gently reveal the fingerprint.
- Cut off a piece of packing tape (it's easiest to have the adult helpers doing this) and press it gently keeping the edges unstuck so they can peel it off easier.
- Peel it off and stick to an index card that the girl has written her name on.
- Wash hands really well. :)
SHOE PRINTS:
This was our overlap/do-at-home activity. So if a girl finished an activity before others in her patrol, and had already cleaned up, she could do this. You may need to use some of your graphite, or some chalk, or just have them walk around on asphalt or dirt. We did not have enough time for this for most girls, so we sent it home with them. You could elaborate on it a bit, if you want it to be a more involved activity, and have the girls leave a shoe print on paper, then have each girl walk around with the paper and try to match it to the actual shoe, etc.
Because of time, we needed a quick and easy fifth activity, so this was it.

Shoe prints won't work if their shoes are squeaky clean.
COLOR CODES (Steganography):
This was based off of some research I did into Chromatography. Which was cool! But opted instead for steganography, which is basically hiding messages in pictures or text. More info on it here. Also, steganography is a hard word to say, seriously. It look like it could mean "if dinosaurs could write" or something. Practice saying it before you get to the meeting.

This is an example of a much easier way to approach it.
But, it wouldn't take 20 minutes and I needed comparable time for each activity.
I'm glad I opted for way more complicated. The girls had a great time figuring it all out.
Do what works best for you!
A great online resource for making Morse Code messages can be found here.
Please note: If you have girls who are colorblind, a steganography activity probably won't work. But they can still participate if you're using a coded message like mine below (and not just colored letters to form a message, like above). Just have them work with a partner. The partner uses her red glasses and copies down the Morse Code, while the colorblind girl translates the code.
You will need the following items for this activity:
- Colored glasses (I made five total. Each pair was used three times)
- Colored messages (variety for each group, so not everyone is working on the same message)
- Scrap paper (one per girl)
- Pencils (ditto)
- Morse Code Key (see below)
- Helper cheat sheet so the volunteers could help prompt girls if they got stuck
Prepare before the meeting:
- Print out the sheets below and cut each in half (each sheet has TWO messages on it; each girl needs one message -- the last message probably won't work for your troop, so discard it)
- Print out the Morse Code keys (one per girl)
- Create a volunteer/helper cheat sheet with translations (keep this one folded away)
- Paperclip one message, one scrap paper, and one Morse Code key for each girl in each patrol (I had three groups of five, with one left over spare for each in case someone's didn't print out well). Make sure you use different red sheets for the girls in each patrol, so they aren't all working on the same message.
- Bundle each patrol's packets together, so it's easy for your volunteers to pull out a new batch for the next group
- Make your glasses (see below)
Red cellophane glasses:
You will need the following to make your own (one per girl, per group. You don't need to make each girl a pair of glasses if you're doing these activities as rotations. Just make the total you'll need per group):
- Card stock
- Cellophane (I used clear pocket divider cover things; you could use thick shrink wrap from packaging, etc. Just has to be thick and clear. Saran wrap won't work. Does your school have a laminating machine? I bet there's a bunch of scrap plastic you could use.)
- Red Sharpies (fresh is best)
- Tape
- Scissors
Follow the steps below to make your own. I made five glasses, but didn't bother to put ear pieces on them. The girls just held them with one hand, and it worked fine. If you have time, add ear pieces.
Make sure the marker on the cellophane pieces is DRY before you tape the red cellophane over the holes in your card stock, or else you'll end up with red ink everywhere. If your marker doesn't go on smoothly, use your finger to spread the ink around. It'll make a mess though, so wear gloves (also, rubbing alcohol works well for getting Sharpie off tables. Ha!)

I traced the front shape of the 3-D type sample glasses I had on hand, onto a folded piece of
card stock. Then cut out the shape and unfolded.

After you've cut out the glasses shape, mark roughly where to cut out for eyes, keep the shape folded in half, and use an X-Acto knife to cut the slots for the red cellophane.

Use a red Sharpie to color the cellophane, which should be larger than the eye hole, but smaller than the card stock. You're going to tape the red cellophane inside the glasses shape.
Red Sharpie transfers pretty easily.

This is what the inside should look like with cellophane taped in.
Once you're done, close and tape the card stock edges shut.

Ta-dah! Homemade spy glasses!
Print out all this stuff:
You don't have to use my stuff. You can find others online, or make your own! But here's everything we used for the meeting. You will cut the red cards in half, and each girl in each group rotation/patrol gets a different one (so they aren't all working on the same message at the same time):

"We are a great troop" and "Girl Scouts is awesome"
Each word is on its own line.

"This is super fun" and "Morse code is cool"

"Secret codes are cool" and "Miss Renee rocks"
And okay, so that last one is unusable for your troop, unless you happen to have a Miss Renee... Ha! So, just discard the #6 and use 1-5 for your group rotations. If you have more than 5 in a patrol, have them work in pairs.

Each girl gets a copy of this to use and to take home and keep. Remind them that when Morse Code is written, the dashes are typically raised slightly so you know you're not looking at it upside-down. That's why the color sheets all have raised dashes. I didn't use the numbers, but it's nice to include them for reference.
What to do in the actual meeting:
Make sure the girls coming from the Fingerprints table have washed their hands well. Smudged graphite can really mess with this activity.
Give each girl her paper-clipped bundle and a pencil. Tell her that each line of code is ONE word and to copy down the code exactly as she sees it. Don't try to translate it until you have everything copied down on your scrap paper. That way if they make a mistake, it's easier to find where they went wrong. (Reiterate how careful detectives are!)
You can have them draw one of these: "/" in between each letter, if that helps. Some of my girls used their pencils to trace/color over the code on the actual paper, which made it visible without the glasses. Very clever girls!
You will need the following items:
- String/cord (pre-cut, one per girl. Make these a bit longer than necessary, to accommodate knots)
- Pony beads (variety, round)
- Tube beads (like these; see below)
- Morse Code sheets (see above)
Prepare before the meeting:
Make a sample necklace for yourself. Tie knots in between the words (or you could tie single knots in between letters and double knots in between words. Whatever you like). I used the same color beads for letters (so all my E letters were one color, etc.), but you don't have to do that. The round beads are dots. The tubes are dashes. The girls LOVED this!

Bucket of (tube) beads at Michaels. Super cheap and worked great!

My "Miss Renee" necklace
DNA EXTRACTION:
Lots of great instructions online. Here's one example. Here's another. But don't worry; it's not nearly as complicated as it sounds. The key is to do it at least once at home so you won't stumble in the meeting, since timing is key. The measurements don't have to be exact, honestly. But try to get close if you can. It's more about proportions.
We finished the patrol/group rotations for the other activities, cleaned up, and then everyone did this together, in pairs. All my adult helpers pitched in, which was GREAT! This can get tricky in terms of timing, especially the last step, so having more hands on deck is good.
You will need the following items:
- Rubbing alcohol, chilled (I put mine in a cooler with ice the night before, and brought the cooler to the meeting with me)
- Small clear acrylic cups -- we worked in pairs for this, so I had two per pair. (You could use mixing bowls and cups instead, or go super fancy and get beakers. I just went to the Dollar store and bought cheap punch-size acrylic cups)
- Wooden popsicle sticks (skewers can work too. Toothpicks are a bit too small, IMO)
- Plastic spoons
- Dish liquid (any brand will do. I've heard Dawn works well but I used a clear liquid. It was fine)
- Sturdy Ziploc baggies (don't get the cheap ones, they'll rip)
- Frozen strawberries -- THAWED! (Frozen ones work best, because once they thaw, they're already mushy. Plus, they have the tops cut off). I bought two bags but really only needed one. You don't need a ton, maybe three or four per girl, if they're medium-sized berries)
- Salt
- Paper napkins (or cheesecloth if you have it. We just used generic paper napkins -- they were the soft, super cheap cheap, double-ply kind. Not the Disney Princess style that have a more solid outer layer. You want something that liquid can pass through easily, but that won't tear)
- Measuring cups/spoons
- Water
- Clean up towels for spills
Prepare before the meeting:
Run through it at least once beforehand. I should've done it twice, because I forgot a step early on during the meeting and had to start over. Which was no big deal, but that meant we ran over a little time-wise. So definitely do the experiment at home first, and I'd advise doing it twice just to be safe.
The night before, chill your alcohol and grab a cooler, so it'll still be cold for your meeting. And don't forget to thaw your strawberries! If you leave them out overnight on the counter they should be nice and mushy for your meeting the next day.
What to do in the actual meeting:
Talk to the girls about how detectives use DNA, and what DNA is (I was surprised that some had no idea, so we had a nice little quick intro to genetics).
1. Pass out the cups (two per pair), plastic spoons (one per pair), popsicle sticks (two per pair), and napkins (extras on hand in case of spills or tears, etc.).
2. Give each pair of girls a sturdy Ziploc, and scoop some mushy strawberries into each one. Make sure the baggies are very well sealed, with the air pushed out. Set aside.
3. Put 1/2 teaspoon salt, 1/3 cup water, and 1 tablespoon of dish liquid in one cup per pair of girls.
4. Have them use the spoons to gently mix the solution. This will be the extraction liquid. Set it aside.
5. Take turns gently mushing strawberries in baggies for ~2 minutes, or until it's as mushy as possible (they loved this part!). Set aside.
6. Have them place the napkins carefully over the top of the second cup. Press down in the middle so it sags well, and the strawberries won't spill over. Set aside. (You can use rubberbands to hold it in place, or just fingers.)
7. Add three tablespoons of the extraction liquid to the mushed strawberries baggy. You're done with the extraction cup (but hang on to it in case you need to re-do one).
8. Re-seal baggy (air pushed out) and work it through for another minute or so, until it's very well blended with the strawberries. Don't overwork it! You want to be gentle -- don't make bubbles.
9. Open the bag and carefully pour into the cup with the napkin on top. Have one girl hold the napkin in place with the middle pushed far down, while the other pours the mixture. Watch it drip into the cup.
10. Very gently pick up the edges of the napkin, so the mushy strawberry solution is contained within, then gently squeeze it so you get as much liquid into the cup as possible.
11. Carefully pick up the cup, then tilt it slightly. Pour a small amount (about 1-2 tablespoons? Test it at home and see) of chilled alcohol down the side of the cup (if you pour it straight in and it splashes, the experiment won't work as well).
12. Set the cup down and watch. It should start to work immediately. See the white layer forming? The alcohol is pulling strands of DNA from your mixture!
13. Use popsicle stick to carefully dip and grab the DNA strands.

Randomly Googled image. I was too busy to take pictures of our actual experiment, but it was cool!
Next up? Detective Part Two -- Halloween Scavenger Hunt.
Getting Started with Juniors: Bridging & First Meeting Preparation
When my girls were Daisies, we held our troop bridging in the fall of their new second-grade year at school. Some troops prefer to bridge in spring or summer, at the end of their level. I preferred to do it in the fall for two reasons:
1. I did not want to waste troop funds on bridging badges, vests, etc., until the girls were re-registered for Brownies.
2. I wanted it to be a troop event, and make it special, and end of the year is a really tough time to get everyone together for something like this, because our schools here let out very early, and many parents are either dealing with spring sporting tournaments, or starting summer vacation.
Waiting until our first Brownie troop meeting in the fall worked best for us. As always, you do what is best for your troop! :)
However, this past spring our service unit held an Awards Ceremony, and offered a chance for all bridging troops to have their ceremony as part of a service unit event. We opted to participate in this, but I waited until fall before buying bridging badges and "flying up" wings for their Junior vests.
Regardless of when you hold your bridging ceremony, all girls can walk across the "bridge" to show they're moving up, but only those who've completed the required steps receive their rainbow bridging badge for the following year.
That said, we also reduced the frequency of our troop meetings (but extended the time for each meeting to compensate), because back to back meetings twice a month for both troops was too much for me. So our first Junior meeting was not about bridging (though we did have special rainbow treats). It was diving right in to planning the year ahead.
What you will need to do ahead of time:
- Make sure your roster is complete. Check with your SUM or council regarding "Early Bird" renewals (these are typically spring to early summer, though the girls are technically still Brownies until the new GS year begins in the fall -- at least in our council).
- Assist with online registration as needed.
- Make a list for parents of everything they will need in terms of uniform (vest, sash, pins, badges, etc.). Don't forget to include your troop crest!
- Revamp your attendance sheet, kapers, patrol info, etc.
- Look at your finances and decide how much your troop dues will be.
- Get health info forms from your SU or council (or create your own, if none are available -- these should include emergency contact info, allergies/health conditions, medications, etc., and stored in a small manila envelope that's labeled with your personal contact info, inside a ziploc in your first aid bag. The bag should live with you at all times when you're doing anything with your troop. These forms are confidential and for emergencies only).
- Double check your first aid bag to make sure everything's up to date and replace any expired medications or supplies.
- Make sure your adult volunteers have re-registered, and their background checks are up-to-date.
- Check your new adult/girl ratios (these change per level).
- Type up an email and/or take-home sheet to give parents at the first meeting. Include the dates by which all dues, forms, etc., are to be turned in. Never have parents write you a personal check for troop dues. All checks should be written to the troop. (And I far prefer checks to cash, as it's easier to keep track, but your mileage may vary.)
- Revamp your troop's website (we use Shutterfly, which works very well, but I had to change the banner and theme from Brownies to Juniors, and update member contact info, etc.).
- Check with your meeting place coordinators to ensure your SU's insurance is up to date, etc.
- Add troop meeting dates to your online calendar.
- Add online sign-ups for snacks or volunteers for each meeting.
- Make a list of ALL the official badges that can be earned on the Junior level. (Use mine below as a start.)
- Make a list of the three Journeys and what they entail. (Use mine below as a start.)
- Type up an intro to Bronze Award for the girls. (Use mine below as a start.)
- Print out everything you need!
- Bring spares, just in case you have last minute add-ons.
Below are the Welcome certificates I made for them. I give them a new one at each level, and I prefer a Welcome one to a Bridging one, as we always have new girls, it seems. A Welcome one covers everyone, and is something to give a new girl, while the others are receiving their Bridging badge and Wings.
Here is a sample Welcome certificate so you can see what they looked like, and a blank template that you can either open and add to, then print. Or you can save and print, and write in the information by hand. It's up to you. Or make one of your very own!


There are bridging certificates available online (and through purchase at GSUSA), and here's a quick one I came up with a few years ago, if you want to use it:

At the meeting, you may want to talk to the girls about whether they want to earn badges, work on a Journey, and start thinking of potential Bronze projects. I looked at our meeting schedule/dates for the year, and it seemed to make the most sense (to me, for my troop) to have us working on badges the first year, and Journey/Bronze/TAP the second year. Plus, this doesn't exclude any new girls who may join the troop in our second year of Juniors -- they can still earn their Bronze if we're doing Journey then as well.
The girls agreed wholeheartedly.
Just like with Brownies, I gave them a list of all the official badges they could earn as Juniors, and had them pick their top four. I explained that they could work on badges independently as well, if they wanted (I stress this every year, because as they get older, they SHOULD be working on things independently. If I had a small troop, it would be easier to accommodate each girl's interests. But my troop is still pretty big, so we have to do a majority rules approach. But that doesn't mean any one girl is restricted from pursuing something else that interests her).
Below is the printout I gave the girls. Please note, it does not include two badges, as we earned those at fall camporee, which took place before our first meeting. You can adapt as you like, as always. Also, it does not include things like My Promise, My Faith or Junior Aide, etc. Those are things we would work on over time, or outside of regular meetings.
1. I did not want to waste troop funds on bridging badges, vests, etc., until the girls were re-registered for Brownies.
2. I wanted it to be a troop event, and make it special, and end of the year is a really tough time to get everyone together for something like this, because our schools here let out very early, and many parents are either dealing with spring sporting tournaments, or starting summer vacation.
Waiting until our first Brownie troop meeting in the fall worked best for us. As always, you do what is best for your troop! :)
However, this past spring our service unit held an Awards Ceremony, and offered a chance for all bridging troops to have their ceremony as part of a service unit event. We opted to participate in this, but I waited until fall before buying bridging badges and "flying up" wings for their Junior vests.
Regardless of when you hold your bridging ceremony, all girls can walk across the "bridge" to show they're moving up, but only those who've completed the required steps receive their rainbow bridging badge for the following year.
That said, we also reduced the frequency of our troop meetings (but extended the time for each meeting to compensate), because back to back meetings twice a month for both troops was too much for me. So our first Junior meeting was not about bridging (though we did have special rainbow treats). It was diving right in to planning the year ahead.
What you will need to do ahead of time:
- Make sure your roster is complete. Check with your SUM or council regarding "Early Bird" renewals (these are typically spring to early summer, though the girls are technically still Brownies until the new GS year begins in the fall -- at least in our council).
- Assist with online registration as needed.
- Make a list for parents of everything they will need in terms of uniform (vest, sash, pins, badges, etc.). Don't forget to include your troop crest!
- Revamp your attendance sheet, kapers, patrol info, etc.
- Look at your finances and decide how much your troop dues will be.
- Get health info forms from your SU or council (or create your own, if none are available -- these should include emergency contact info, allergies/health conditions, medications, etc., and stored in a small manila envelope that's labeled with your personal contact info, inside a ziploc in your first aid bag. The bag should live with you at all times when you're doing anything with your troop. These forms are confidential and for emergencies only).
- Double check your first aid bag to make sure everything's up to date and replace any expired medications or supplies.
- Make sure your adult volunteers have re-registered, and their background checks are up-to-date.
- Check your new adult/girl ratios (these change per level).
- Type up an email and/or take-home sheet to give parents at the first meeting. Include the dates by which all dues, forms, etc., are to be turned in. Never have parents write you a personal check for troop dues. All checks should be written to the troop. (And I far prefer checks to cash, as it's easier to keep track, but your mileage may vary.)
- Revamp your troop's website (we use Shutterfly, which works very well, but I had to change the banner and theme from Brownies to Juniors, and update member contact info, etc.).
- Check with your meeting place coordinators to ensure your SU's insurance is up to date, etc.
- Add troop meeting dates to your online calendar.
- Add online sign-ups for snacks or volunteers for each meeting.
- Make a list of ALL the official badges that can be earned on the Junior level. (Use mine below as a start.)
- Make a list of the three Journeys and what they entail. (Use mine below as a start.)
- Type up an intro to Bronze Award for the girls. (Use mine below as a start.)
- Print out everything you need!
- Bring spares, just in case you have last minute add-ons.
Below are the Welcome certificates I made for them. I give them a new one at each level, and I prefer a Welcome one to a Bridging one, as we always have new girls, it seems. A Welcome one covers everyone, and is something to give a new girl, while the others are receiving their Bridging badge and Wings.
Here is a sample Welcome certificate so you can see what they looked like, and a blank template that you can either open and add to, then print. Or you can save and print, and write in the information by hand. It's up to you. Or make one of your very own!

This one is a sample. Obviously it had the info for each girl in my troop.

This one is a blank template you can use for yours, if you like!
There are bridging certificates available online (and through purchase at GSUSA), and here's a quick one I came up with a few years ago, if you want to use it:

Just print it out on card stock and write in the info by hand.
At the meeting, you may want to talk to the girls about whether they want to earn badges, work on a Journey, and start thinking of potential Bronze projects. I looked at our meeting schedule/dates for the year, and it seemed to make the most sense (to me, for my troop) to have us working on badges the first year, and Journey/Bronze/TAP the second year. Plus, this doesn't exclude any new girls who may join the troop in our second year of Juniors -- they can still earn their Bronze if we're doing Journey then as well.
The girls agreed wholeheartedly.
Just like with Brownies, I gave them a list of all the official badges they could earn as Juniors, and had them pick their top four. I explained that they could work on badges independently as well, if they wanted (I stress this every year, because as they get older, they SHOULD be working on things independently. If I had a small troop, it would be easier to accommodate each girl's interests. But my troop is still pretty big, so we have to do a majority rules approach. But that doesn't mean any one girl is restricted from pursuing something else that interests her).
Below is the printout I gave the girls. Please note, it does not include two badges, as we earned those at fall camporee, which took place before our first meeting. You can adapt as you like, as always. Also, it does not include things like My Promise, My Faith or Junior Aide, etc. Those are things we would work on over time, or outside of regular meetings.
(page one)
Put a check by the top
four badges you're most interested in earning this year.
Camper and Simple Meals were earned at
fall camp, so those are not included on this list. If you were unable
to attend camp and would like to earn these independently, let me
know. You can do the same for any
other badge, if it's not chosen by the troop to work on in our
meetings this year.
_____ Musician
_____ Staying Fit
_____ Digital Photographer
_____ Scribe
_____ Entertainment Technology
_____ Make Your Own (we pick as a
troop) EDIT: GSUSA is no longer offering this program, but you could always contact an independent embroidery company and create your own fun patch as a troop.
_____ Independence
_____ Gardener
_____ Jeweler
_____ Detective
_____ Junior Horseback Riding
_____ Animal Habitats
_____ Social Butterfly
_____ Geocacher
_____ Playing the Past
_____ Product Designer
_____ Junior Girl Scout Way
_____ Drawing
_____ Inside Government
_____ Junior First Aid
_____ Practice with Purpose
_____ Flowers
(page two)
Put a check by the one
Journey that appeals to you the most.
Journeys can either be done over a long
period of time (several meetings, which means roughly half the school
year), or we can meet on a weekend day and spend the day getting it
all done.
We have the option to work on a Journey
this year, or we can wait until next year. However, we have to have
the Journey completed in order to earn our Bronze award (it's a
requirement, and our Bronze project doesn't have to be related to our
Journey, but many girls find inspiration in the Journey they do that
helps them pick a community service project for their Bronze award).
Many troops do the Journey and Bronze
in the same year, to accommodate any new girls who might've joined
the troop.
We will do our Bronze Award next year,
definitely. But for now, look through these and see what you think!
Choose the Journey you are most
interested in (descriptions for each below):
_____ GET MOVING!
_____ aMUSE
_____ Agent of Change
Energy
use is the topic when Juniors on the GET
MOVING! Journey.
Some sample activities include: go for nature walks, interview
power-use experts, or conduct energy audits of local buildings (or
whatever we decide to do!). You will take action by launching
carpools, working to dim the lights on city buildings, or promoting
energy savings at school, etc.
As
you explore your own talents and learn about women who have made the
world better, Juniors following the Agent
of Change
Journey
also discover the benefits of teamwork—whether it’s talking about
energy use, helping a local food bank, or using your unique talents
in other ways. It's up to us to decide how we want to be an Agent of
Change!
Exploring
new roles and busting stereotypes are just two of the activities
Juniors enjoy on the aMUSE
Journey.
Whether it’s role-playing, speaking to actors about your
characters, starting a “mix-it-up” day to meet new classmates, or
something else entirely, you will develop increased confidence and
inspire others.
----------
At the meeting, we talked about the Bronze Award and what it entails. We had worked on the notion of Community in Daisies and in Brownies, so they had a clear understanding of what Community means. Each year of Brownies we worked on a Community Service/Philanthropy project, so they understand that as well. Now it's time to start actively looking for a need in our community, that our troop can help with, for our Bronze.
So throughout the year they will be looking for potential projects -- looking at needs in their/our communities -- in preparation for Bronze.
That's it for now! Junior Detective Badge info will be coming soon!
Tuesday, December 8, 2015
Holiday Bingo
Taking a break from Daisy- or Junior-specific info to post a just for fun free printable Bingo set!
I was tired of all the bingo sets you have to BUY (because the free downloads are usually just one card. Which is no fun, because then everyone yells "BINGO!" at the same time).
So here are the ones I made. Hope they work! Please note, all the images were either free clipart I found online, or I made it. Print out however many cards you need. I believe there are 24. I'll include some "spares" at the bottom, which is what I printed off and cut out to use for the Bingo caller to draw from.
The easiest way to download these is from my File Cabinet page. Simple click the Download button by each file, then unzip it to view. If you cannot unzip them, or have issues, you can download each page individually below.


The above cards are to print out for the kids. I laminated mine so they could be re-used in the future.


These last two are the Caller's cards. There are some duplicate images (tree, snowman) so just discard those when you print it out. I was in a rush. ;)
Next up? No clue! I've been crazy busy! Will post some fabulous things over winter break, hopefully.
Subscribe to:
Posts (Atom)