Welcome!


Welcome to my blog! I started it when I was a new Girl Scout leader and needed some kind of organized "to-do" list. I decided the best way to keep things organized was to start a blog. So here it is! My oldest troop has since bridged up to Juniors, and I've taken on a Daisy troop as well, so I will continue updating with new Juniors information and additional Daisy stuff too. My hope is to continue to update with every level as my troops advance. But we'll see.

Thanks for stopping by, and I hope it's helpful!

Tuesday, May 20, 2014

Brownies (or Daisies!): End-of-Year & SWAPS Wallhangers

Preface: I paid for all the end-of-year gifts out of my own pocket. You don't have to give ANY gifts to your girls (or volunteers) at the end of the year (the time and effort you've put in all year is a gift in and of itself!), but if you decide you'd like to give them a small gift, keep in mind that troop funds you have at the end of year will be what you start with at the beginning of next year.

I did use troop funds for the membership stars and any official badges included. But the rest? I just wanted to do a little something fun for my girls. Plus, I have two girls in my troop whose families are moving away, and I wanted to do something special for them. But wanted to include all the other girls, too!

So I went through all the pictures I had from the last two years, and put together DVD slideshows for the girls (I did it in iPhoto and iDVD; I believe Windows has a DVD Maker program. Google it if you need help. Be sure to get DVDR discs, not CDR discs). I bought recycled paper disc envelopes (like these, but I found some cheaper at Walmart), and some small round Avery labels.

After burning the DVDs, I created labels with our school name and troop number (it's fuzzed out in the pictures below for anonymity, but you can find the templates on Avery's website for which label you choose, if you like) and stuck them on the outside of the envelope (just used a Sharpie to write on the DVDs).

They turned out really cute!

Then I took 9x12" green felt pieces (I used a blue one for my one Daisy girl, but I had lots of green, which is why I used it instead of brown for Brownies; I had brown ribbon though. See below), and wooden dowels, and created scroll/wallhangers for the girls' camp SWAPS (or whatever they want to hang on there -- earrings, etc.).

To make these, you can pick up felt from any craft store, or order in bulk here. If you're wanting the exact same color for all the wallhangers, don't order bulk mixed colors, because the colors/shades vary so much per pack. But if you're wanting to do a variety of colors, a mixed pack is a great way to go.


I purchased the dowels at Walmart in the craft section:


You will need TWO dowels for each wallhanging. Make sure you get the kind that are flat on the ends, not pointed (don't get skewers).

First step is to put it portrait-style (vertical), and fold over one end about 2/3rds of an inch. Then pin it. (Or you can fold it, use clear tape to hold it in place temporarily, and slide a dowel through to see how wide you need to make the hem. You want the dowel to slide through tightly. You don't want it loose, or else the dowels will fall out too easily.)


Next, line it up on your machine (you can hand sew but it takes ages; using a sewing machine is much easier if you can), and sew it so you're leaving roughly 1/2 to 2/3 of an inch or so open in the hem (depending on how fat your dowels are), to slide the dowel through.


Then do the other end, and run a dowel through both hems. Then take a ribbon and tie on the top dowel ends (unless you're adding a card, in which case, wait before tying it off), so it forms a triangle that you can use to hang it on the wall. You can pin membership stars, patches, awards, etc., to it if you like. 

I added a card stock piece with out troop # (the sample here has "Brownies" where I had our troop number, and I typed in my name after "Love"), punched a hole in it, and strung the ribbon through it before tying it off:


I'm not posting a full sheet template of this, but if you like, I can. Just leave a comment below, and include your troop level for font color/name.

I bought green paper bags (you could also buy white or brown, in the garbage bags/plastic wrap/paper plates aisle at Walmart or Target -- or go to your local Dollar type store, for cheap), some tissue, and then pinned membership stars and patches on the wallhanger. Then rolled it up in tissue, added the DVD to the bag, wrote each girl's name on the bag in Sharpie, and used a glue dot to adhere the "End-of-Year Party" fun patch on the outside the bag. Check your local council shop for End-of-Year fun patches. Or Google it, and you can find several patch companies online that may be cheaper than your council shop. (If you use a glue dot on a patch outside the bag, make sure NOT to stick it to the price tag, as the glue dot will stay stuck, but the price tag can fall off the patch, which makes the patch fall off the bag!)

Here's what it looked like with everything laid out (sticker and tag have both been altered to remove identifying info):


And here's what it looked like loaded up with SWAPS:


That's my daughter's -- she loved it! We hung it on her bulletin board in her bedroom. Now those SWAPS are out of the Ziploc that was shoved in a drawer, and hanging where she can see them, and remember how much fun she had this year! :)

I bought a personalized green GS tumbler with straw for my co-leader (Etsy and eBay are both good sources for these), and printed these out on card stock, then rolled up and tied with ribbon, for each of my volunteer moms. Another leader came up with this adorable idea; I altered the wording to better suit my troop. I left the troop number blank so you can print it and fill in the blank with your own number.


Next up: Summer Break! See you in a bit! :)

Brownies: Do Anything Patch (Barbie)

It's our next-to-last troop meeting, and I wanted to do something fun and easy. I'd read online about the Barbie fun patch (where GSUSA partnered with Mattel), but I have some moms who aren't big Barbie fans (here's an interesting article about it -- it details the online activities which are a bit confusing in terms of leadership, empowerment, and appearance, I think. While my personal opinion is Barbie is too controversial to promote the positive goals of GS, I'm obviously not the one in charge; plus I respect my troop parents' opinions).

But there was some info in the worksheets that definitely had value. Don't throw the baby out with the bath water and all that.

So I did what I nearly always do: I adjusted it to fit our troop. ;)

Here's a link to the GS/Barbie "I Can Be Anything" program. Here's a direct link to the English PDF file (there's a Spanish one available too). Unlike printed GS materials, the PDF is designed for leaders to print out for their girls (yay! No copyright infringement issues).

But when I printed mine out, I literally pulled out any reference to Barbie (just didn't print those pages), and did not include the Daisy steps (this program is for Daisies or Brownies, but I have mostly Brownies). And I only used the Brownie pages that were generic (meaning no reference to a name brand that might cause concern with some parents).

I had no issues with doing this, even though it was Barbie-themed, because had I left it Barbie-focused, some of my girls wouldn't have been able to participate. So I adjusted as needed. If your moms don't mind Barbie, print out the PDF as is, and you can order the patches here. However, that's the individual (girl) order process. I didn't go digging for how troop leaders order the patches, since I wasn't interested in them.

Instead, I found these:


Still pink, and very cute.

We went through the steps on pages 3, 8, 9, 10, and 13. (I skipped the fashion designer one because we spent so much time focusing on the patch pages.)

We began by having the girls sit around two tables scooted together to make one large table. I sat with them as they ate their snack and we went around the table one at a time and talked about what we wanted to be when we grew up (lots of aspiring veterinarians in my troop! And at least one future President!). No interrupting. Everyone had a chance to say what she wanted to be. Everyone received equal attention.

Then we cleaned up from snack and I pulled out the markers and handed out the pages I'd printed out (front and back, to save paper, stapled together as a booklet). This was interesting: several of the girls said they didn't see a Brownie patch listed that went with their goals, so I told them to design their own patches!

When we finished, they were each given the do-at-home/online sheet (page 13), and instructed to do this with an adult (per online safety guidelines for this age). And I handed out the fun patches.*

*I do have a Daisy member (an "Independent" though we still call them "Juliettes" which is cute), so I took two small blue daisy-looking flower patches (generic, from Michaels, not GS patches) and sewed them over the word "Brownies" on the patch. So it looks like "Daisies Can Do Anything." This way she received a fun patch for the activity as well, and it was better suited to her level.

If using the Barbie booklets as inspiration doesn't appeal to you, you can simply make up your own steps for this fun patch. It's a fun patch! You don't have to stress over following strict guidelines for earning it. :) Or, if you prefer to use the Barbie material and do the Barbie patch, go for it! I'd run it past your parents ahead of time just to be safe.

This was a good, super easy meeting. The girls had fun, had some great dialogue spinning off from their choices (things like Suffragette movement and the importance of voting -- doesn't matter whom you vote for, but you should always vote, because of the brave women who fought so hard for us to be able to do it!), and earned a cute patch for the back of vests.

Up next: End-of-Year Goodies and SWAPS Holders!

EDIT: Ah, so since I posted this, the actual GS Barbie dolls have been released. Click that link, or check with your council shop if you're interested in buying one. What is my opinion on it all? I think GSUSA could've found a better toy to partner with, personally. There's simply too much controversy surrounding Barbie. Yes, it's just a doll. But it's also a highly controversial doll.

I've seen many leaders ask, "Why couldn't she at least be wearing the correct uniform?" And "Why a Junior sash? I've never met a fourth grader who was shaped like Barbie." Yep. Valid points. But I've also seen plenty of "It's just a toy. What's the big deal?" type comments out there too.

There are definitely some interesting opinions on both sides.

My daughters opted for the Brownie Elf Plush Doll instead of Barbie. Your mileage may vary, and that's totally fine.

In the end, listen to your girls and respect your troop parents' feelings too. When it comes to hot button topics, err on the side of caution, and don't assume it isn't a big deal to some parents. Good luck!


Saturday, April 5, 2014

Brownies: Bugs Badge

For this meeting, we invited a local entomologist from the area to come and speak with the girls about bugs! Our wonderful visitor oversees a large butterfly habitat and brought some specimens (all of which died of natural causes -- no pins in them), as well as several very interesting (and creepy-looking) bugs!

The girls had a great time learning all about butterflies and other insects. And the best part? I didn't have to search for bugs during winter. ;)


At the end of the meeting the girls thanked our visitor, and we gave her a box of Samoas as well. :)


And one of our moms made these delicious cupcakes for our meeting. The girls LOVED them. They were delicious!


Here's the recipe. (Thank you, insidebrucrewlife for the wonderful recipe!)


EDIT: Yes, there are loads of things you can do for this badge. We just chose to bring in an outside expert, because it was that time of year where frankly, we all needed a bit of a break. Google is your friend. :) Search for more suggestions. 

Thursday, April 3, 2014

Brownies: Fairy SWAPS and Camp Prep Fun

This year our camp theme is "Fairies and Firelight." So rather than continue on with our legacy badges, we took a break for a few meetings to work on fun camp-related activities.

First up, I found a nice deal on fairy wings at Amazon.


The wings already had very pretty glittery designs (swirls and whatnot) on them, but I brought in some glitter glue and let the girls go nuts decorating their wings. They each came up with their own "fairy" names for camp, too, and I wrote the name on the wings in Sharpie (be sure to put a piece of paper underneath as it will bleed through easily).

It didn't matter if the girls were attending camp or not; each girl got a pair of wings. But it encouraged some of the girls who hadn't expressed an interest in camp, to sign up for the outing. And they came up with some great names for fun at camp!

The wings held up really well. With the exception of a few activities, many of the girls wore the wings all day. None of the wings ripped or fell apart. The glitter glue stayed put as well. It was super cute!


Next up, making SWAPS! Some people go all out for SWAPS and that's great! But keep in mind you typically need at least ten per child, so if you have a large troop, you might end up biting off more than you can chew if you go with a super involved craft. Because our troop is so large, and we made crafts in a troop meeting before knowing for sure how many girls would be attending camp, we went with something simple but cute.

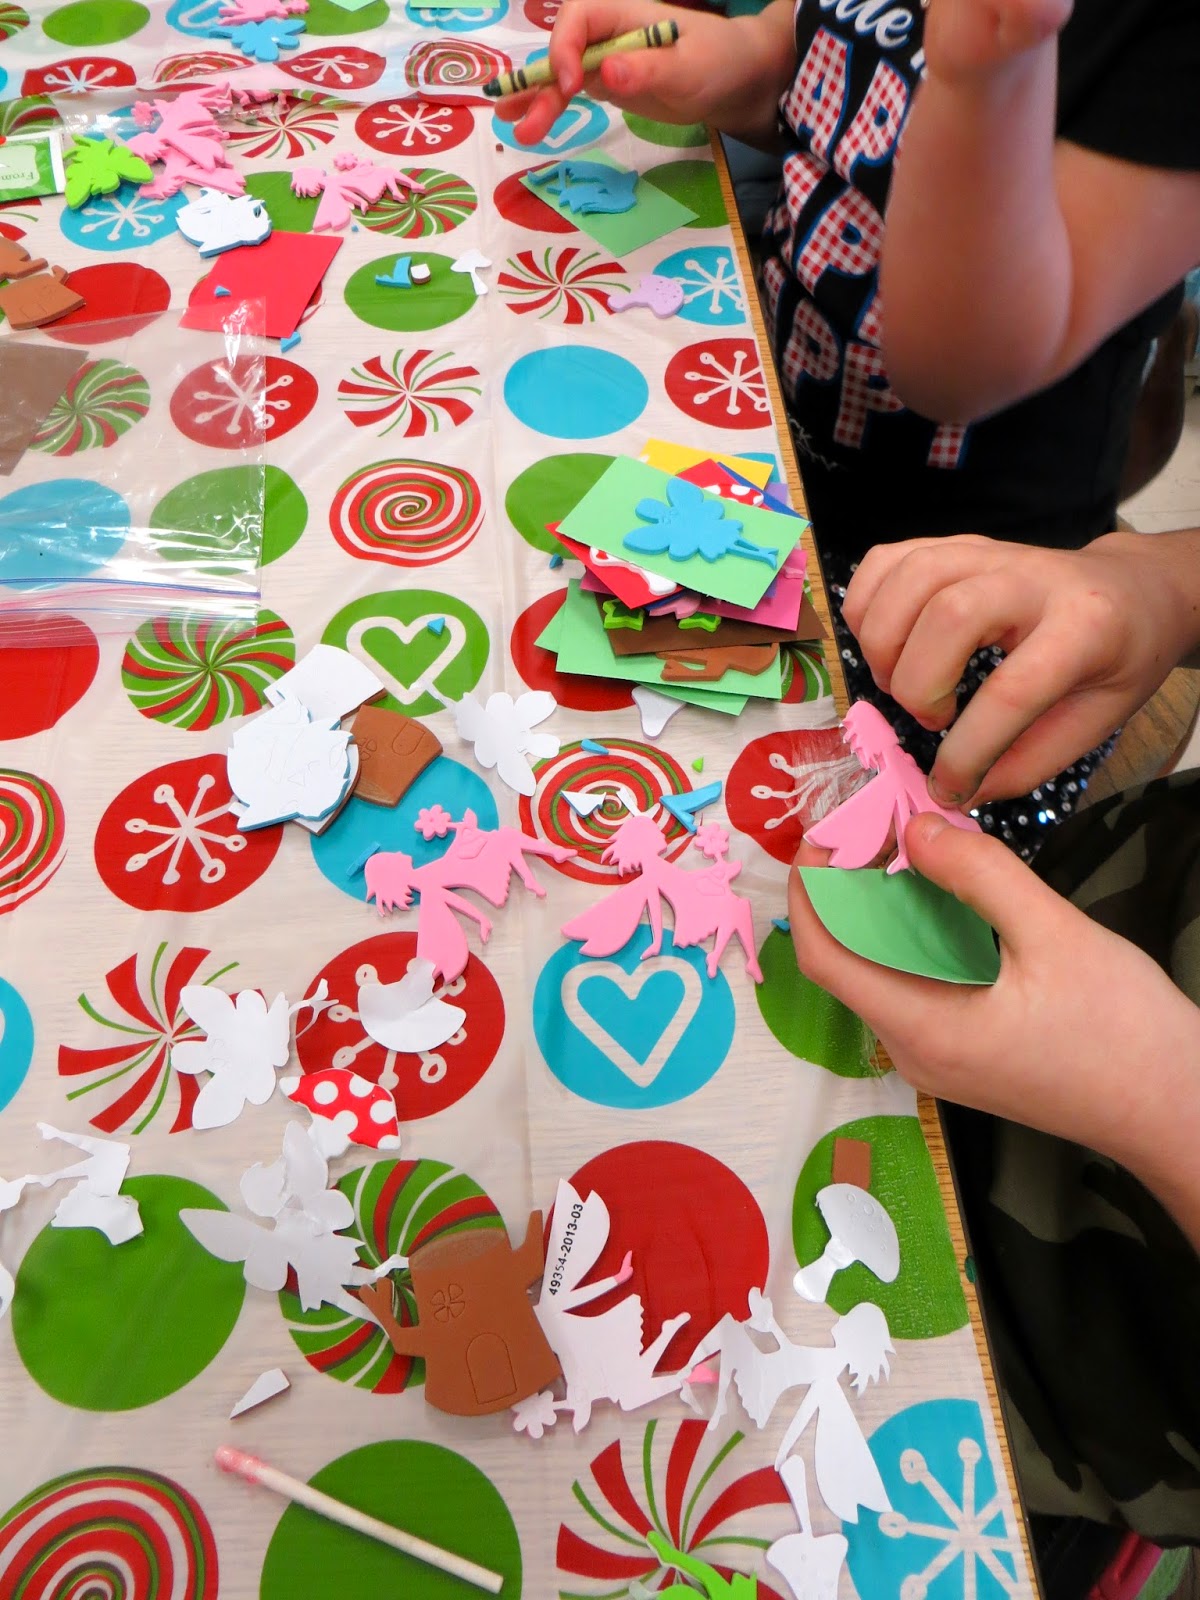
I went to Michael's and found some foam fairy sticker kits and small (roughly business-card-sized) card stock. There wasn't quite enough of the card stock, so I just cut some colored 3"x5" cards in half (or so -- made them the same size).

First up, separating the stickers:


Then putting together some samples:


We wrote the troop number on the back of the cards first, then put stickers on, then added pins.

I separated out 10 into each baggy, and had all the girls work on them, regardless of whether they planned to attend camp or not. Then I brought them home, added the pins, and put them in a big bag with glitter! It coated the sticker bits that stuck off the cards, and added more fairy fun. We ended up with 15 per girl for camp.


EDIT: Next year, we will be doing SWAPS with a Daisy troop to work on our Bridging to Juniors badge.

Daisies & Brownies: Cookies!

Mmmmm. Cookies!


For those of you new to leading a Girl Scout troop, cookie (or fall product) sales can be overwhelming, I know. Thankfully your Service Unit/Council should provide you with training and paperwork that will help walk you through the process.

In the meantime, here are some good things to remember (in no particular order):

- Daisies and Brownies should never take orders, or deliver cookies, without adult supervision.
- They should never enter someone's home or vehicle
- They should be supervised and in uniform not only when selling, but also at booth sales
- All parents must sign a permission slip ahead of time (this protects YOU, the leader)
- Decide whether you will accept personal checks from customers for your troop. Our troop does not. We require parents to pay one lump sum (postdated check to the troop) when they pick up their cookies. If you don't pay, you don't get cookies. ;) This helps cover everyone.
- It's up to parents whether they want to take personal checks or not.
- Keep in mind you have to deliver all these cookies, so while it might seem tempting to take your order sheet to a mall or other large area, it can make delivery a challenge.
- Familiarize yourself with your Council's online cookie order system (we use eBudde). And use it! If you have questions, don't be afraid to contact your Service Unit's Product Salesperson.
- Have parents provide size information from the get-go. That way you aren't scrambling at the end re: incentives.
- NEVER leave cookies in a car or by a sunny window. Doesn't matter how cold it is. If they have chocolate in them, they will melt. (I know. My Thin Mints went all wonky; thankfully they were my own box.)
- NEVER leave cookies where pets/animals are (not only will this destroy your cookie stash, but it can prove fatal to dogs if they eat chocolate).
- Encourage your girls to practice taking orders with each other in your troop meetings. Bring money in and have them make change. Make sure they are using polite words with each other.
- Decide if you're going to work on any secondary Money badges for cookie sales. While you cannot have a booth specifically to raise money for another non-profit organization, you can donate proceeds from your cookie sales to a non-profit after cookie sales ends. In other words, feel free to have a "Help Us Pay for Camp!" booth, but not a "Help the Animal Shelter" booth.
- Take a clipboard with you when you're walking your neighborhood taking orders. It makes it easier for people to fill in their info.
- If you run into another GS on the way, split the neighborhood in half. One takes the left side, one takes the right, etc.
- Make sure you always count your boxes, and your parents re-count them when they pick them up. Be sure you have everything written clearly on a receipt. You never know when you might have some issues later on....
- And lastly, give your parents deadlines that are actually a few days before the "real" ones. That gives you all some breathing room. If your Council starts removing funds from your account on the 15th, have your parents postdate their checks for the 12th, and deposit the funds on the 12th. That way if there are any issues with payments, you have some time to resolve it.

There are many more tips, but those are just a few that can help.

For information on cookie/finance badges, check your Daisy/Brownie books. In each year, they can earn TWO of the money badges (two leaves for Daisies; two triangles for Brownies). There are also specific steps required for earning the cookie pins. Here's a list.

And don't forget, you can freeze the cookies! Especially Thin Mints. Mmmm. Thin Mints.


Saturday, January 18, 2014

Brownies: Celebrating Community & Meet My Customers (Intro)

Celebrating Community Part One:

For this troop meeting, we began working on Celebrating Community. My original plan was to tie it into the holiday season, and do something for a local community, so we were able to go caroling at a local retirement home, which the girls (and the audience) really enjoyed.

But for the actual meeting, we did something a little different.

We finished up talking about First Aid and reactions in emergency situations, then made a big thank you card for the firefighters who'd come to the last meeting.

We talked about what a Community is, and all the different types of Communities we belong to (family, school, etc.). I gave the girls this handout and let them color it however they liked:


Then we talked about the impact one individual can have on her Community, and to think about how our actions (based upon the things we've learned from the Girl Scout Law) can make a difference. We also talked about where we live and famous people from our state, and things in our area.

It was a very laid-back meeting because it was the last troop meeting before our winter break, so the girls were distracted, and a more loose approach to the meeting was the way to go.

Cookie Sales/Meet My Customers:

It had been over a month since we met, and our Cookie Season has started! We talked about our individual goals, why we sell cookies, and went over the rules and guidelines for taking cookie orders and interacting with potential customers.

I asked them questions like:

"What do you wear when you're taking cookie orders?" (uniform/vest)
"What are some polite words you should use?" (please/thank you)
"Do you ever walk around by yourself taking orders?" (no; you have to have an adult with you)
"What do you do if someone doesn't want to order cookies?" (tell them about donating)
"What if someone is rude to you and says, 'NO! I don't want any cookies!' " (which is silly; who could ever be rude to an adorable little Brownie selling cookies? And they'd respond politely and walk away)
"How much do the cookies cost? One box? Two boxes? Three?" (ha -- I made them do math!)
"When do the cookies come in?" (late February)
"Do you take money when the people place their orders, or when you deliver the cookies to them?" (deliver)
"Is it okay to go inside someone's house or car?" (no; but we live in an area where people tend to be very hospitable and will often invite you in, so I told them to reply with a 'No thank you, it's a troop rule' so as to not cause offense, but still keep them outside with their adult)

. . . and so on.

Here is some good information on requirements for earning the Cookie Sales pin and more.

After we talked about cookies, we had a big snack, which was birthday cupcakes and cookies for me! :) It was a lot of fun!

Celebrating Community Part Two (how to combat the "Mean Girls" thing at this age):

Before the meeting began, I split them into pairs: "special buddies." I had, ahead of time, created a couple of different lists of pairs. I very specifically split the girls up so they'd be paired with someone they weren't already very close friends with. I also tried to take into account other things like personality, and pairing two girls from different neighborhoods, or economic status, or churches/extracurriculars, etc. It was challenging to do with 18 girls, and I had to have a couple of alternate lists in case anyone was absent.

But we ended up with a pretty good mix of pairs of girls who weren't already BFFs.

Normally we scoot the art room tables so they are one big table. But this time we left them all separate so the girls could spread out a bit and be able to focus on their special buddy. During the meeting, if anyone needed to go potty or leave the room, she took her special buddy with her. They sat next to their buddies the whole meeting.

After snack time, we cleaned up and then started talking about Community again. I reminded them about what we'd done last month before winter break. Then we talked about the difference between a Community of Convenience (something they didn't have control over, like where they lived, or went to school, or whose class they were in), versus a Community of Interest (friendship or club, etc.), which could be as small as two people.

We talked about how important it is to not only live according to the "Be a Sister to Every Girl Scout" aspect of the GS Law with our fellow troop members, but how to reach out beyond our Communities of friends and recognize when someone needs a friend. We talked about making new friends and that it doesn't matter if they are or aren't in your Community (neighborhood, class, etc.). You can form your own Community based on common/shared interests.

I had them sit and talk with their buddies until each pair could come up with at least three shared interests that did not include (1) where they lived, (2) where they went to school, or (3) what grade they were in, because that's how our troop was formed -- we are the second grade troop at a specific elementary school, so they ALL have those things in common already. I wanted them to find other things they liked and was pleasantly surprised that it took some pairs a while to do it. Because they had to work at it and interact, and get to know each other in the process.

Here's a bookmark I made that you can print on heavy card stock to give the girls:


Craft for Celebrating Community Part 2:

After each pair had done this, we passed out pipe cleaners and baggies of beads. Each girl then made a friendship bracelet for her new buddy. They helped each other and worked together and we walked around reminding them to make it how their buddy would like it. They weren't making it for themselves, but for their (new) friend.

We've made bracelets in the past using waxed cord or elastic, but pipe cleaners are so, so easy. The beads don't fall off as easily in the process. They require less prep time too, so it's easier on the troop leader and parent volunteers at the meeting.

Afterward the girls could either twist the pipe cleaner around the beads to close it (make sure the sharp ends are on the OUTER ring so they don't scratch the child's skin):


Or you can tuck the ends of the bracelet BACK into the last beads, and slide it through (see the light purple fuzzy bit at the top of the picture? That's the pipe cleaner doubled):


When we were finished I told the girls that Girl Scouts can go anywhere and have conversations with anyone, and find something in common with those people. Girl Scouts can learn to be friends with anyone they want, and are always diligent in looking out for people who need a new friend.

The main reason I approached Celebrating Community this way, instead of how a lot of leaders approach it, which is teaching the girls about their town or state (ours cover that in school anyway, so I was okay with not going into it), is that the "Mean Girls" thing seems to start earlier and earlier these days, and it worries me, honestly. As a mom of two girls, I've already seen the effects of snobby kids ostracizing others in school, even at this very young age. It's depressing. And I'm determined to help my daughters and my Brownies all be aware of how to make friends and how to be a friend. If this can help even one child, then it's worth it absolutely. And taking time to get to know an individual and make a new friend is a great lifetime skill to have!

Next Up: Cookies and Money Manager

Friday, November 15, 2013

Brownies: First Aid Badge

Today we worked on our First Aid badge. I scheduled a visit from our local fire department ahead of time, but had back-up activities planned in case they were called out on an emergency and couldn't come.

Beforehand, I went through the Brownie book on First Aid, to ensure I covered all my bases. I tried to include the most important aspects, and added in my own items based upon the girls' levels of comprehension, interest, and what I felt were realistic expectations to have for second-graders.

I broke it down into two parts:

1. PREVENTION

For Prevention, we talked about things like always wearing a bicycle helmet when riding your bike on the street or sidewalk, because that's our state's law (your state's law may be different; regardless, a helmet is a good thing when you're on a bike). We also talked about other laws, like wearing seat belts and/or being in a booster when riding in the car.

As with every discussion topic, we did a lot of question/answer time, and I tried to keep it upbeat and fun. But my intention was to have the girls think of situations where emergencies could be prevented, because that was just as much an important part of First Aid (at least for a group of seven- and eight-year-olds) as the second part, Response, is.

We talked about always swim with a buddy, and wearing sunscreen. We also talked about identifying poisonous plants (ivy, oak, and sumac, including how important it is to never collect wood for a campfire from a water area, in case it's sumac. Inhaling smoke from sumac can be very, very bad -- deadly even).

I made cards for the girls ahead of time that had pictures of the plants on them:


I printed these on heavy card stock.

On the back, I had the next template printed. The reason it is upside-down is to make it so you can print it on the BACK of the above template, and easily cut out the cards so you don't have to worry about them lining up properly, since it's a front/back image. The text does not appear upside-down on the actual cards, however. Just on the template:


Here's what this side says:

WHAT TO DO IN CASE OF AN EMERGENCY:
1. KNOW WHAT IS AN EMERGENCY:
 - FIRE
 - UNCONSCIOUS PERSON
 - INTRUDER
 - STRANGER DANGER
2. STAY CALM
3. GET AN ADULT
4. REMEMBER YOUR EMERGENCY NUMBERS:
POLICE, FIRE, DOCTOR: 911
ADDRESS: ________________________________

__________________________________________

PHONE: __________________________________

You are welcome to make your own cards however you like, but if you want them to be double-sided, you can use the above templates. Just make sure to test your printer first so you're flipping the poisonous plants side over and feeding it properly so the Emergency side prints right behind the Plants side. (If you have issues, feel free to leave me a comment.)

2. RESPONSE

The second part of handling an emergency, and providing First Aid, is Response.

We went through the list on the cards and talked about what constitutes an emergency, and how important it is to never call 911 as a joke.

911 Calls

I showed them my cell phone and how it's locked and how to use it to call 911 even if it's locked. I told them not everyone's cell phone is like mine. Some have different buttons, etc. But on mine, it's not enough to just dial 9-1-1. You have to also press the green send icon. So it's not just about dialing 9-1-1. You have to press "talk" or "send" or look for a green icon like the one on my phone.

We talked about what questions the operator/responder might ask them. And how it's important to tell them what has happened and stay on the phone since they might have questions for you.

When to Call 911

We talked about fires, and what "unconscious" means, also what an intruder is (someone trying to break into your home to steal something, or someone trying to break in with an intent to do harm). I did add that if someone is breaking into your home and you cannot find an adult or get out, you should find a really good hiding place. I told them where in my house I would hide, and had them all think of the very best hiding spot they could think of (this is a good way to lighten up what could otherwise be a potentially scary topic, I think).

We also talked about Stranger Danger. I did not go into great depth on this because I really didn't want to overwhelm them with the scarier aspects of Response, but basically told them that if anyone they did not know tried to take them somewhere, they were to YELL and SCREAM and KICK and HIT, and most importantly?

RUN AWAY!

We talked about if you're outside playing and a stranger makes you scared or seems to intend harm or wants you to go with him, you are to RUN AWAY!

I asked the girls, "What should you do?"

"Run away!" they said.

I said, "SAY IT LOUD! I WANT TO HEAR HOW FAST YOU'D RUN! What would you do?" and they all yelled loudly (with great gusto) "RUN AWAY!!!"

YES! Exactly. That's my girls! YELL IT! DO IT! Good job. :)

And doing something like that -- interacting in a way that gives them strength and reminds them of their own ability to be brave -- can help make an otherwise scary topic seem less intimidating. It can empower the girls. I reminded them Girl Scouts are courageous and strong (red petal from Daisies!) and we know to run away fast!

Fire Department and First Aid Kits:

We were really excited the Firefighters were able to come to our meeting!

They brought in their First Aid kit and demonstrated use of the items inside. It was a lot of fun for the girls, and the firefighters seemed to enjoy it as well. They explained bandaging techniques, applying pressure to a wound, splints, neck braces, and more.

They talked about what to do in a fire (stop, drop, roll, and cover your face!), and the importance of having a family meeting place, and practicing fire drills.

The girls asked a lot of questions! It was great. :)

Then I pulled out my First Aid bag -- the one I always, ALWAYS keep with me at every single Girl Scout event -- and dumped it on the table. I asked the firefighters to look at what I had inside, and tell me if it was a good First Aid kit or not, or if I needed to add anything.


It was a lot of fun explaining why there were bandanas in there. It's a national Girl Scout rule that you must have your hair pulled back, and your head covered (hat or bandana), when you're around a campfire of any kind.

I did not get a chance to talk about things like always keep a bucket and rake on hand when you have a fire, but at this point we were nearing the end of the meeting. (And that can wait for pre-camp meetings.)

The girls got to pass around and look at several items the firefighters brought in, and really seemed to enjoy the visit. I can't say how much I appreciated the fire department taking the time to come and do this presentation for our troop. It was really wonderful.

If you are not able to have a visit from your fire department, go to your school nurse, or see if there's a parent in the troop with medical training. Call your local Police/Fire headquarters and ask if they have EMTs on hand who might be available. Basically anyone in authority with medical training can help out here, if you have someone to ask. Just know that because of the nature of their job, they may not be able to show up. So definitely have a back-up plan on hand!

Mine was toilet paper. Yep, TP. That wonderful thing. I'd brought in several rolls and my plan was to split the girls into pairs ("buddies") and have them practice bandaging one another. Basically it would've been a light-hearted game for them to just wrap each other up mummy-style. ;)

Unfortunately, we did not have time to get to this. But that's okay! TP never goes to waste (ha! See what I did there?).

Personal First Aid Kits

The impression I've gotten is that many troops have the girls make their own individual First Aid kids. However, we have a pretty large troop (17 at this count, with 4 visiting kids today alone). So the cost for purchasing adequate supplies was simply not feasible.

I'd looked online but couldn't find any that were affordable and appropriate for our troop. Because we had the added challenge of ensuring there were no medications of any form (including topical ointments) in the kits, because our school's regulations state that no child can carry medication in her backpack. It must be locked in the nurse's office.

Luckily, my co-leader found some kits at a Dollar-type store. But they didn't have quite enough. So I drove to a different Dollar Tree store and found a generic brand of mini-kits that were literally $1 each. (You can order them online here, if they are in stock. But that's a bulk order. I didn't need that many. Google it, if you don't have a local Dollar Tree or similar store in your area. You might can find some online if you aren't in a position for the girls to make their own.)

These kits had a variety of band-aids, gauze, and alcohol wipes (this doesn't count as medication because the school allows anti-bacterial wipes and gel). We passed the kits out to the girls and told them to be sure to fill out the Emergency info on their cards and include those in the kits for their backpacks.

The girls were delighted with their kits! I was so thrilled we found them for such an affordable cost.


In the end, I think it was a successful introduction to First Aid, which is what I think a realistic expectation for second-graders. I don't expect kids this age to know how to put a broken arm in a splint, or know how to properly bandage a serious wound. But knowing how THEY can help prevent accidents, and how THEY can identify what is, and help respond in, an emergency? That's very realistic and age-appropriate, in my opinion. Today was all about introducing them to it. As they get older, we will go much more in-depth with this topic for later badges.

Bottom line: I'm proud of my girls. I feel like they left today's meeting armed with information that can truly help them. And I'm very thankful to our local fire department for coming out and helping with this meeting.

Next up? Celebrating Community!